
Infiltration Steps
Controlling erosion on steep paths.
Purpose: Infiltration steps use crushed stone to slow down and infiltrate runoff. They are effective on moderate slopes, but consider building wooden stairways on 1:1 slopes (45°) or areas where rocks or surface roots make it difficult to set infiltration steps in the ground.
Note: Prior to installation, contact NH DES or Maine DEP, and your town’s Code Enforcement Officer to find out if permits are required. See our page with information about permitting.
Installation
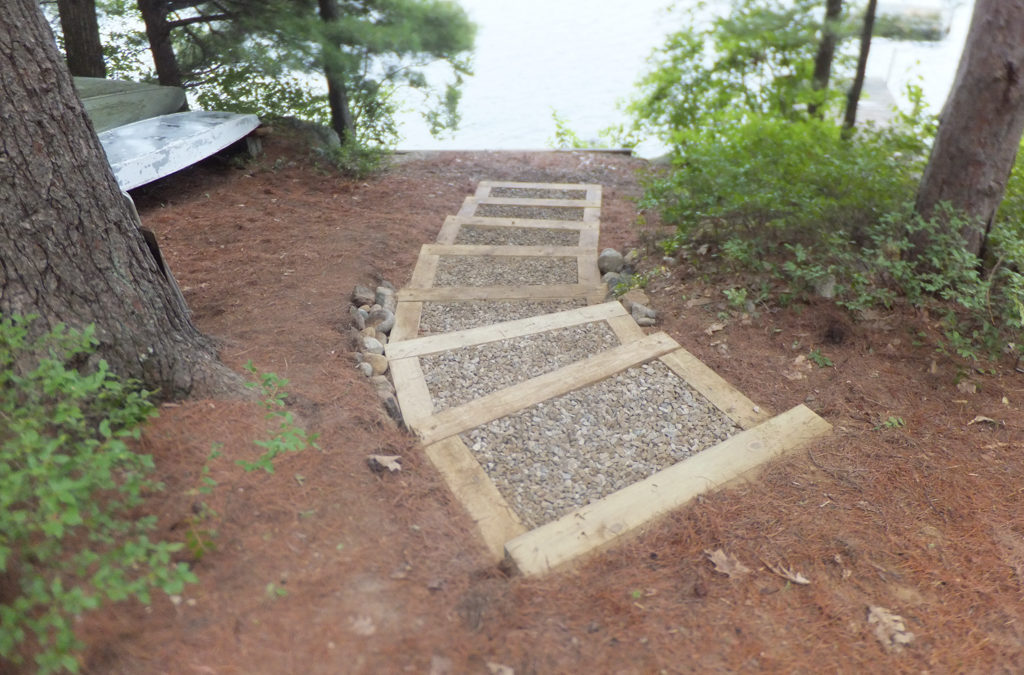
Infiltration steps are steps built with timbers and filled with crushed stone or pea stone. See separate blog and fact sheet for retrofitting existing timber steps. Build new infiltration steps as follows (adapted from www.homestore.com):
1. Calculate the Rise and Run of Each Step
First, measure the overall rise and run of your steps in inches. The step height is determined by the 6” thickness of the timber. Divide the rise by 6 and round off to the nearest whole number to determine the number of steps. Divide the run by the number of steps to determine step width. A comfortable width will be at least 15”.

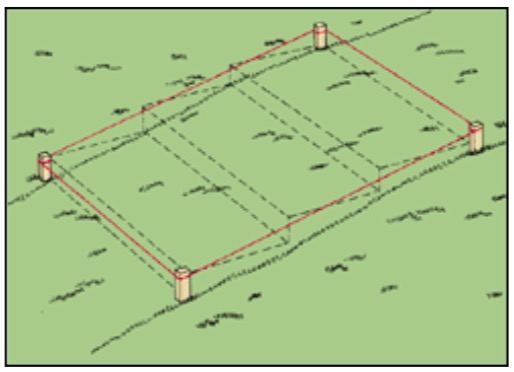
2. Stake Out the Steps
Figure out the step width. A 4’ width is comfortable for one person. Paths must be less than 6’ wide in the shoreland zone. Drive stakes at each corner of the stairway and stretch string between them to outline the steps. Spray paint or sprinkle sand or flour on the ground to mark the outline.
3. Excavate the First Step
Starting at the bottom, dig a trench for the first timber (this will be little more than a shallow groove in the ground). Next, dig trenches for the side timbers, which need to be long enough to extend 6” past the next step’s riser. Check to make sure the trenches are level.
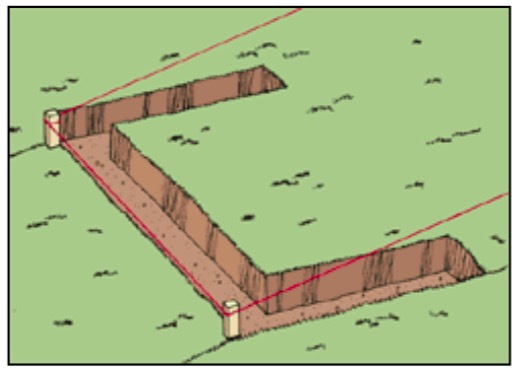
Note: Infiltration steps may not require side timbers, especially if the steps are in an eroded pathway where the surrounding land is higher. In this case, extend the timbers into the adjacent banks so water will not go around the steps.
4. Cut the Timbers
Cut the riser timber to length, then measure and cut the side timbers. Drill 1⁄2” diameter holes 6” from the ends of each timber. Position the step, then remove or add soil as needed to level it. Anchor the step by driving 18” long pieces of 1⁄2” diameter steel rebar through the holes and into the ground. Make sure the rebar is flush or slightly recessed since the edges may be sharp. Set the side timbers in place, and level and anchor them.
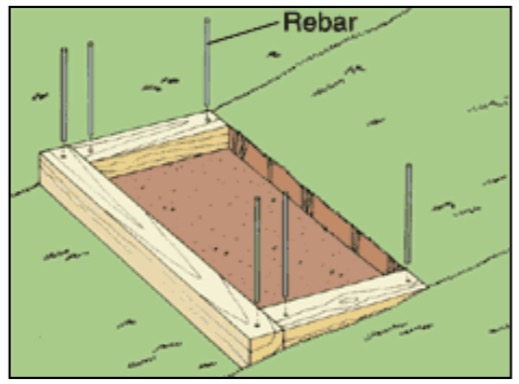
Shovel out the soil inside the step to create a surface roughly level with the bottom of the timbers. Additional soil can be removed to provide more area for infiltration. Make sure to dispose of excavated soil in a place where it will not wash into the lake or other resource.
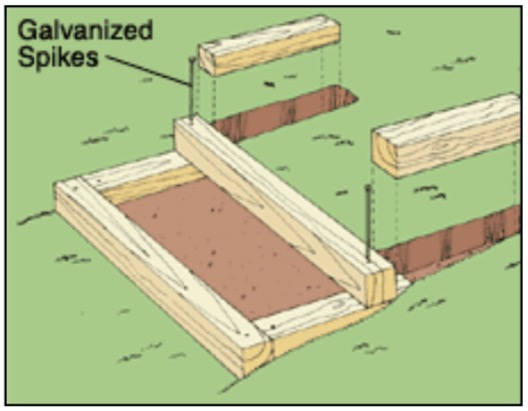
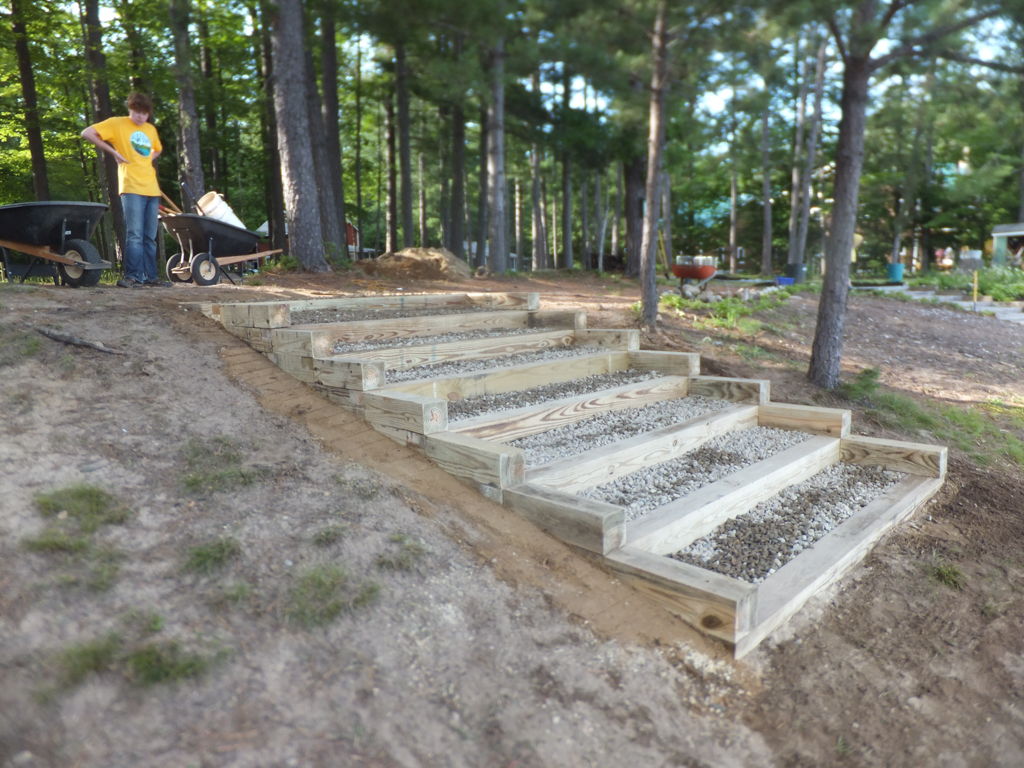
5. Build the Next Step
Measure from the front of the first riser to precisely locate the second riser. Dig a trench for the riser, and trench back into the hill for the sides, as before. Set the riser roughly in place with the ends resting on the side timbers below. The riser is attached to the side timbers below it with 12” galvanized spikes. Drill a pilot hole about 5” into the riser, and spike the riser into the side timbers below. Set the side timbers, drill 1⁄2” holes and pound in 18” rebar pieces into the ground as with the first step.
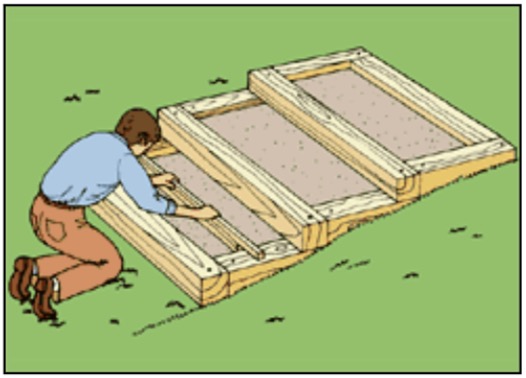
Excavate between the sides, as before. Continue up the hillside in this fashion. When installing the top step, cut the side timbers 6” shorter than the ones on the lower steps – these timbers do not need the extra length since no stairs will rest on them.
6. Lay Down Geotextile Fabric and Backfill with Stone
Line the area inside each set of timbers with non-woven geotextile fabric. This felt-like fabric will allow water to percolate through but will separate the stone from the underlying soil. Make sure the fabric is long enough to extend a few inches up the sides of the timbers.
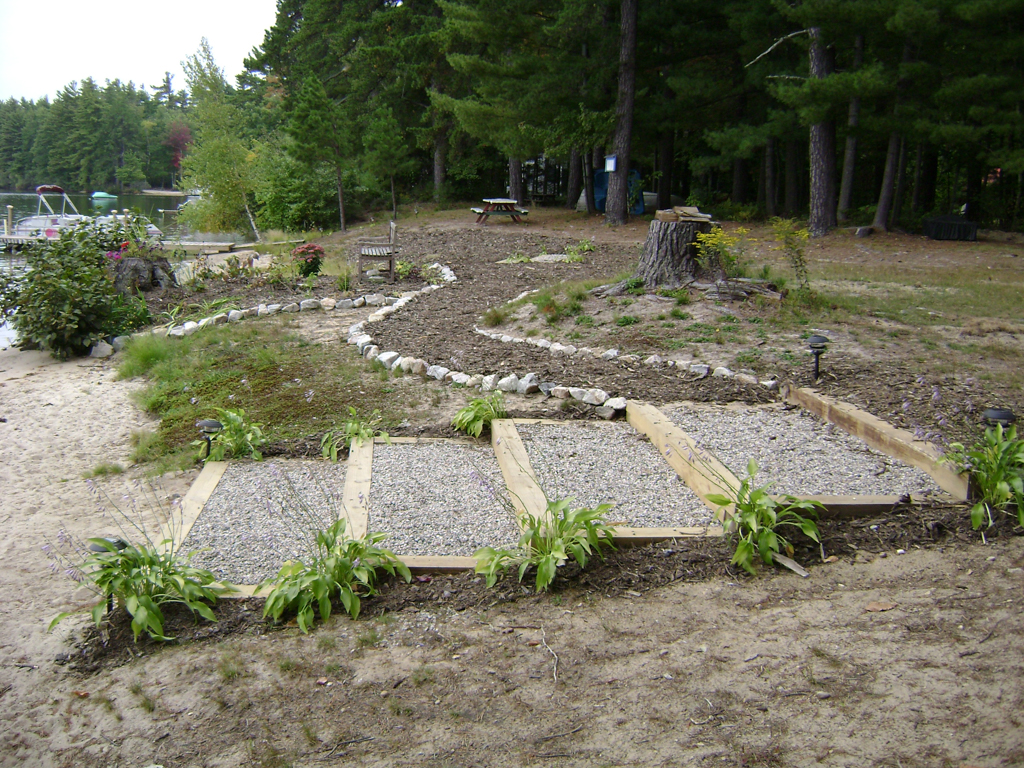
Fill each step with 3⁄4” crushed stone or pea stone until it is about 1” below the top of the timber. This lip will break up water flow and encourage infiltration. Pea stone is comfortable for bare feet but may be more expensive and more difficult to find. Paving stones can also be set into crushed stone to provide a smooth surface for bare feet – as long as ample crushed stone is exposed to allow infiltration.
Seed and/or mulch bare soil adjacent to the steps. Planting areas adjacent to the steps with shrubs and groundcover plants to soften the edges and help prevent erosion.
Materials: Crushed stone and pea stone can be purchased from gravel pits. Contact your local Soil and Water Conservation District for suppliers of non-woven geotextile fabric. Other geotextiles, including landscaping weed barrier, can be substituted for smaller projects. Pressure treated timbers, cedar landscape timbers and steel rebar can be purchased from lumber and hardware stores. Some stores will cut rebar to the specified length for a small fee. Otherwise, rebar can be cut with a hack saw.
Maintenance: Replace rotten timbers. If the crushed stone or pea stone becomes filled up with sediment over time, remove, clean out sediment and replace.
Check out our technical assistance page to learn about getting a free erosion evaluation, and for more information on permitting.
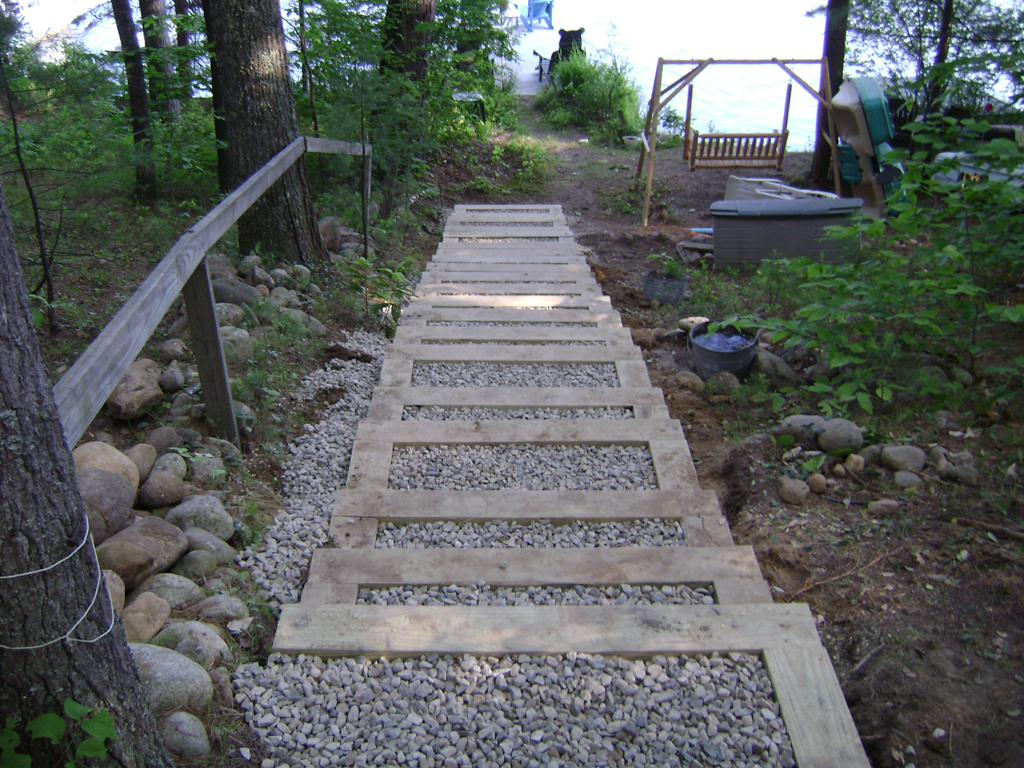
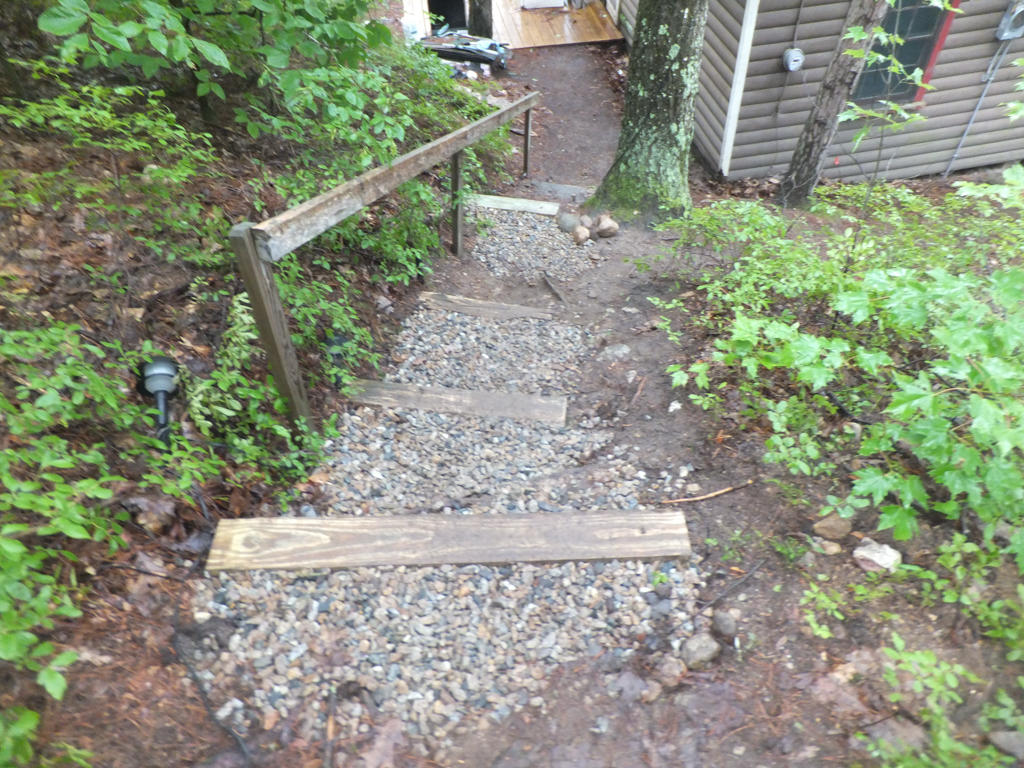
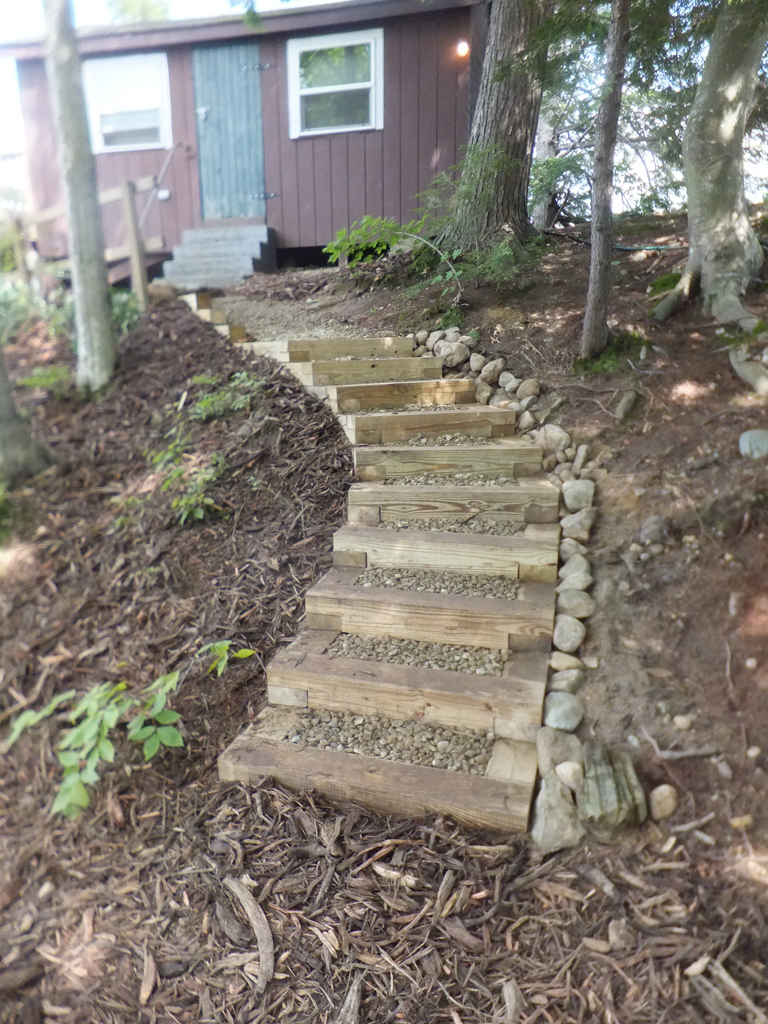
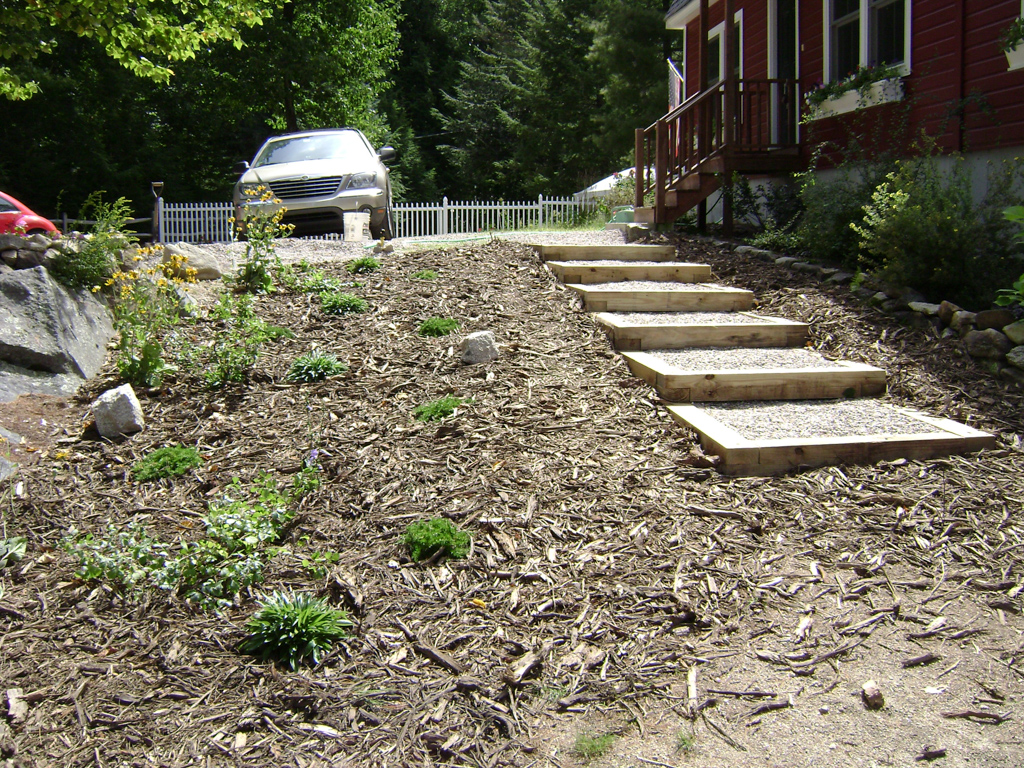
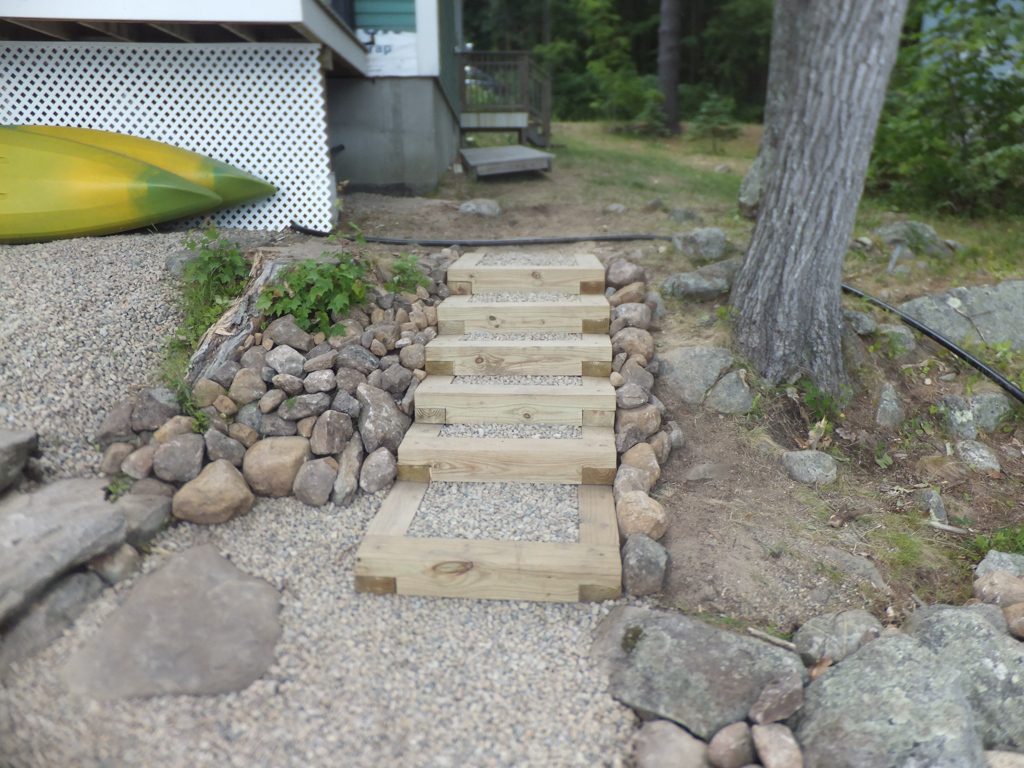
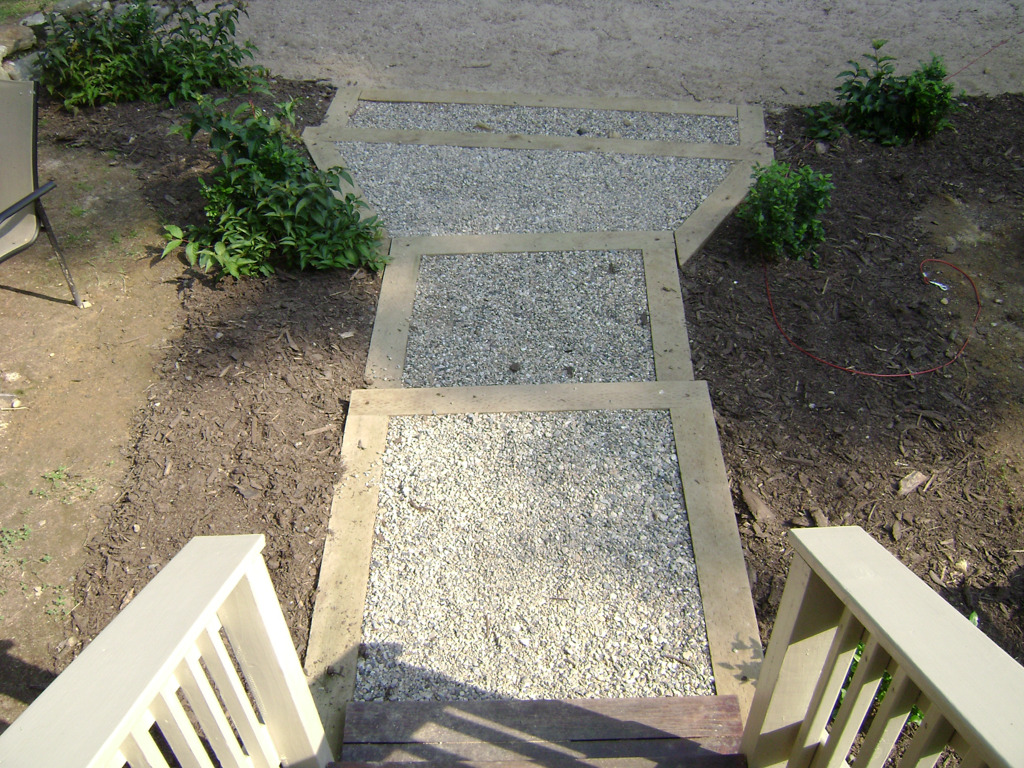
Examples


The Conservation Practices for Homeowners Factsheet Series are available at: Maine DEP or the Portland Water District. You can also find fact sheets at SOAK up the Rain NH.